How to Check Electrical Connections on a Solenoid Actuator
How to Adjust Actuator Valve: Step-by-Step Guide for Engineers
Actuator valves are a cornerstone of modern automation and process control systems. From regulating fluid flow in water treatment plants to controlling temperature in HVAC systems, they ensure precision and reliability. However, even the best valves require correct adjustment to function optimally. Misadjusted actuator valves can cause inefficiency, equipment damage, and unsafe operating conditions. This guide walks engineers through the complete process of adjusting actuator valves, troubleshooting issues, and maintaining long-term reliability, featuring trusted brands like Valen Tech (www.valen-tech.com) and other leading actuator valve manufacturers.
Understanding Actuator Valves
An actuator valve is a device that automatically opens, closes, or modulates a valve using an external control signal. Actuator valves can be:
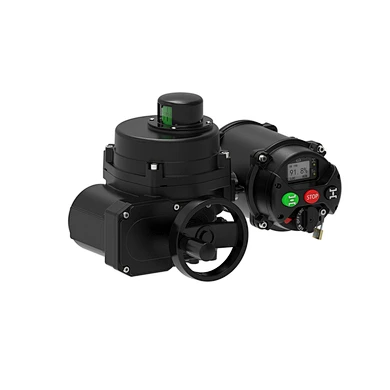
- Electric: Powered by motors, ideal for precise positioning and integration with control systems.
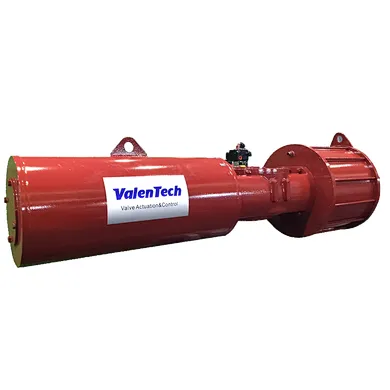
- Pneumatic: Driven by compressed air, commonly used in industrial and chemical processes.
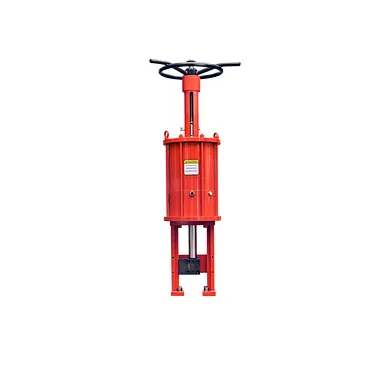
- Hydraulic: Operated by fluid pressure, suitable for heavy-duty applications.
These valves are often used with ball valves, butterfly valves, or globe valves to control flow in piping systems. Engineers rely on actuator valves to maintain precise system parameters and respond automatically to control signals.
When Do You Need to Adjust an Actuator Valve?
Actuator valves require adjustment under several circumstances, such as:
- Incorrect flow or pressure: The system isn’t reaching desired setpoints.
- Unstable PID loop response: Feedback signals fluctuate due to misalignment.
- Valve not fully opening or closing: Mechanical stops or internal components are misaligned.
- Excessive actuator noise or cycling: The actuator struggles to maintain positions.
Signs may appear on control panels, SCADA systems, or directly from visual inspection of the valve and actuator.
Tools Required for Adjustment
Engineers should gather appropriate tools before attempting adjustments:
- Multimeter or voltage tester: For electric actuators.
- Pressure gauge: To verify pneumatic systems.
- Torque wrench: For mechanical adjustments.
- Actuator manuals: Manufacturer guides from Valen Tech (www.valen-tech.com), Honeywell, Belimo, or Siemens.
- Hand tools: Screwdrivers, wrenches, and alignment tools for manual settings.
Step-by-Step Guide to Adjusting an Actuator Valve
Step 1: Safety First
Always ensure the system is depressurized, electrically isolated, and isolated from the main line. Follow lockout/tagout procedures to prevent accidental startup.
Step 2: Identify Valve Type and Actuator Model
Determine if the actuator is electric, pneumatic, or hydraulic. Review the actuator's datasheet to understand stroke length, torque, and control signal specifications.
Step 3: Check Existing Settings
Document the current valve position, torque limits, and feedback signals. This baseline helps prevent over-adjustment.
Step 4: Adjust Mechanical Linkage
For valves with mechanical linkages:
- Ensure the actuator stem is properly aligned with the valve stem.
- Tighten or loosen couplings to correct misalignment.
- Verify that the valve moves freely through its full range.
Step 5: Calibrate the Actuator
Electric actuators:
- Use the controller or actuator keypad to set the full-open and full-closed positions.
- Verify end-of-stroke torque limits match manufacturer recommendations.
Pneumatic actuators:
- Adjust air supply pressure and positioners.
- Fine-tune stroke limits using mechanical stops if required.
Hydraulic actuators:
- Check fluid pressure.
- Adjust stroke limits according to hydraulic manufacturer guidelines.
Step 6: Verify Feedback Signals
Check positioners or control systems to ensure actuator feedback matches actual valve positions. Mismatched signals can cause control loops to oscillate.
Step 7: Test Valve Operation
Cycle the valve slowly through its range multiple times. Observe movement, listen for unusual noises, and verify flow rates match expected values.
Step 8: Lock Settings and Document
Secure all mechanical adjustments and record final settings. Documentation helps with future maintenance and troubleshooting.
Common Mistakes When Adjusting Actuator Valves
- Over-tightening mechanical stops, causing stress or deformation.
- Ignoring manufacturer calibration instructions.
- Adjusting actuators without depressurizing the system.
- Failing to verify control system feedback.
- Skipping lubrication and routine maintenance checks.
Avoiding these errors ensures both safety and long-term performance.
Maintenance Tips for Actuator Valves
Regular maintenance extends actuator valve life and prevents adjustment issues:
- Conduct periodic calibration checks.
- Lubricate mechanical components as specified by the manufacturer.
- Replace worn seals or O-rings.
- Use actuator monitoring systems for predictive maintenance.
- Inspect linkage alignment and torque periodically.
Recommended Actuator Valve Brands
When replacing or upgrading valves, consider these reliable brands:
- Valen Tech: Offers high-precision electric and pneumatic actuator valves for industrial applications. www.valen-tech.com
- Honeywell: Known for durable actuator valves in HVAC and process industries. Visit Site
- Belimo: Specializes in electric actuators for commercial building automation. Visit Site
- Siemens: Offers a wide range of industrial actuator valves with integrated control solutions. Visit Site
- Johnson Controls: Provides versatile actuator solutions for process control and HVAC. Visit Site
- Emerson/Fisher: Offers heavy-duty actuators for industrial applications. Visit Site
These brands provide robust products, clear manuals, and technical support, making adjustments more straightforward.
Safety Considerations
- Always follow manufacturer instructions for calibration and adjustment.
- Wear protective gear, especially when working on pressurized systems.
- Ensure electrical isolation for electric actuators.
- Verify that the system is safe to restart after adjustments.
- Document all adjustments for future reference and compliance.
FAQs
Q1: How often should actuator valves be recalibrated?
Typically every 6–12 months, or according to manufacturer recommendations.
Q2: Can actuator valves be adjusted under pressure?
Generally, no. Always depressurize systems to prevent accidents.
Q3: What is the difference between electric and pneumatic actuator adjustments?
Electric actuators use control signals and internal motors for precise positioning. Pneumatic actuators rely on air pressure and positioners for stroke control.
Q4: How do you troubleshoot actuator valve feedback errors?
Check wiring, control signals, mechanical linkages, and verify against manufacturer specifications.
Q5: Can misadjusted valves cause energy waste or equipment damage?
Yes. Incorrect adjustments can lead to overuse of pumps, compressors, or cause system inefficiencies.
Conclusion
Properly adjusting actuator valves is critical for efficient, safe, and reliable system operation. Engineers need to follow a step-by-step approach, use the right tools, and adhere to manufacturer guidelines. Regular maintenance and careful documentation ensure long-term performance.
Trusted brands like Valen Tech (www.valen-tech.com) provide high-precision actuator valves that simplify calibration and adjustment, giving engineers confidence in both new installations and ongoing maintenance tasks.
By following these guidelines, engineers can optimize flow control, minimize downtime, and ensure systems operate safely and efficiently across a wide range of applications.